

We're an affiliate
We hope you love the products we recommend! Just so you know, we may collect a share of sales or other compensation from the links on this page at no additional cost to you. Thank you if you use our links, we really appreciate it!
Many pet parents are increasingly showing interest in elevated dog bowls. There are a lot of commercial options that you can buy. But you can also get creative and make your elevated dog bowl.
In this article, we outline the ideas of how to make elevated dog bowls inspired by various pet owners and companies too.
You can make a DIY elevated dog bowl at home with simple tools. All you need are the regular food bowls and the base; where they will be placed on.
A homemade dog bowl can even be better than the commercial one because they are made with the owner’s interest, design, and aesthetic taste.
You get to choose the materials, elevation, design, color, and all other bowl designs that you may have in mind.
This is the time you have to decide what pattern your dog’s feeding station will be. You can get down and plaster your dog’s name on their bowl.
We have shared 12 DIY ideas that may interest you in this article. These projects require easy to intermediate skill levels to get done.
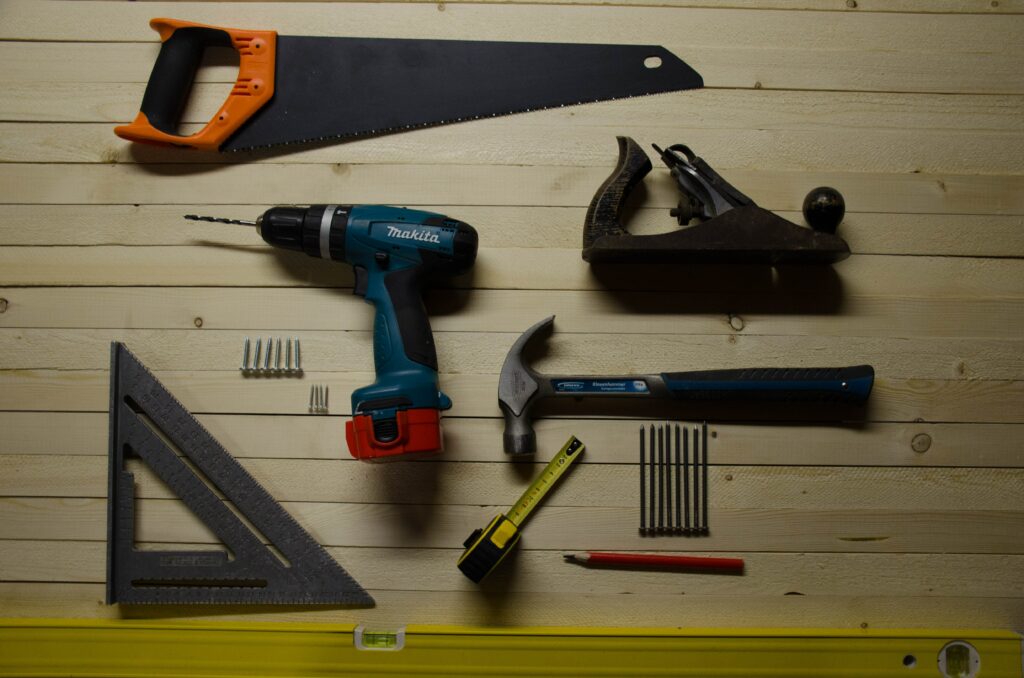
The Common Materials and Tools Needed
When starting with a DIY project for your dog bowl, you need these common tools for your convenience.
All these materials and tools can easily be found in your local stores or online.
- Wood board
- Plastic board
- Recycled furniture
- Wood glue
- Measuring tape
- Jigsaw
- Pencil
- Hammer
- Nails
- Screws
- Drill
- Rubber
- Skid proof material
This list is not exhaustive. You can use any other raw materials and tools that will make your work easier. For example, you can use a glue gun to apply wood glue more effectively.
Why You Should Consider Making Your Elevated Dog Bowl
The following are some of the main reasons why you should consider modeling an elevated dog feeder at home:
1. Cost-effective
Making your elevated dog bowl is affordable and might be cheaper than buying a commercial one.
2. Reuse and recycle materials
These DIY projects offer a chance to recycle some of your worn-out materials. This helps to conserve our environment and limit resource wastage.
3. A chance to become creative
Making your own raised dog bowl allows you to implement the great ideas you have been thinking of.
This is the chance to create something that will perfectly blend with your home’s décor to your desired taste. This is a great chance to capture your dog’s personality in their feeding stations.
4. It allows you to get the correct height
The key factor considered when buying a raised bowl is the elevation. With a DIY project, you can get the correct height and present your doggo with the best position to take their food and water.
The correct height should be around your dog’s shoulder area. It makes your dog comfortable when eating and reduces the chances of bloating.
Before Starting on a Project
Once you have decided on the DIY dog feeder project that excites you, you need to ensure the following:
1. Get a working station preferably in a closed room or out in the yard.
2. Your dog should not be around the working station. You may need another person to help you if the project is bulky.
3. Get the correct elevation based on your dog’s size. You can use this guide to determine how tall your raised bowl should be.
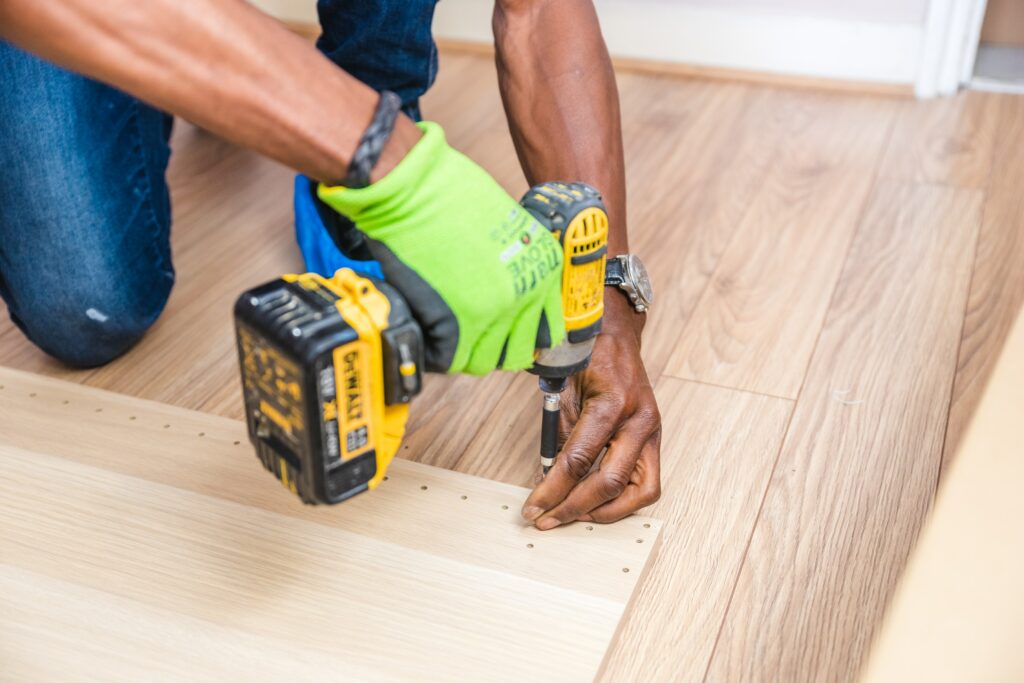
4. Use protective gear when working with tools. You can expect small chippings to fly all over when dealing with wood boards. The following are some of the protective gear that you can use during your DIY project:
- Safety glasses to protect the eyes from flying debris
- Gloves to shield your hand from tools.
- Safety boots to prevent you from stepping on sharp tools
- Ear shielding to filter the sound from loud machines
- Face mask to filter the air from the flying dust particles.
- Knee pads to shield your joints when you kneel.
- Any other safety gear that suits your project
5. Read the instructions carefully before and during the project. Follow the plan step by step to ensure better results.
6. We also encourage you to be flexible and rigid with the plan at the same time. You can find some replacements for items that can be swapped. Do not shy off from improving the aesthetics of your dog’s feeder for example by using different paints and drawings.
12 Homemade Elevated Dog Bowls
You now know what it takes to start making a raised dog bowl at home. Go through this list and identify the project that suits you and your dog.
Once you get the materials and tools ready, everything else is straightforward. Be sure to follow the instructions and adjust the heights to your dog’s size.
1. Elevated dog bowl with a broad base
This beautiful raised dog bowl by the handmade home is beautiful and can be used by multiple dogs. It accommodated three feeding bowls with a broad base design.
Jamin and Ashley made this feeding station with a removable lid to access the base. This provides a storage compartment and also increases the stability of the structure.
You can use the middle station as a water bowl to keep your pup hydrated. Ensure that the water bowl is bigger because multiple dogs may use it.
Feel free to alter the paint color to match your home’s interior décor.
2. Complete dog feeding station
You can follow the 11 steps from this old house to come up with a complete feeding station for your pup.
Jennifer Stimpson estimates the cost of this DIY project to be 40 USD. You might need around two days to complete it.
This station will not only create a raised feeder, but you will also have a handy station where you can store some of your dog’s stuff.
The filled storage compartment also helps in keeping this feeder stable. This is effective for active dogs who may topple their bowls when eating.
3. Industrial dog feeder
You can make a stylish DIY dog feeder with an industrial design. This plan is outlined by Pretty Handy Girl and it highlights a tabled design feeder. Follow the plan step by step to ensure you get good results.
This feeder has been made for large dog breeds but you can alter the measurements to suit your dog’s size.
The woods are hinged together perfectly to provide a stable platform for the dog to enjoy their meals and water.
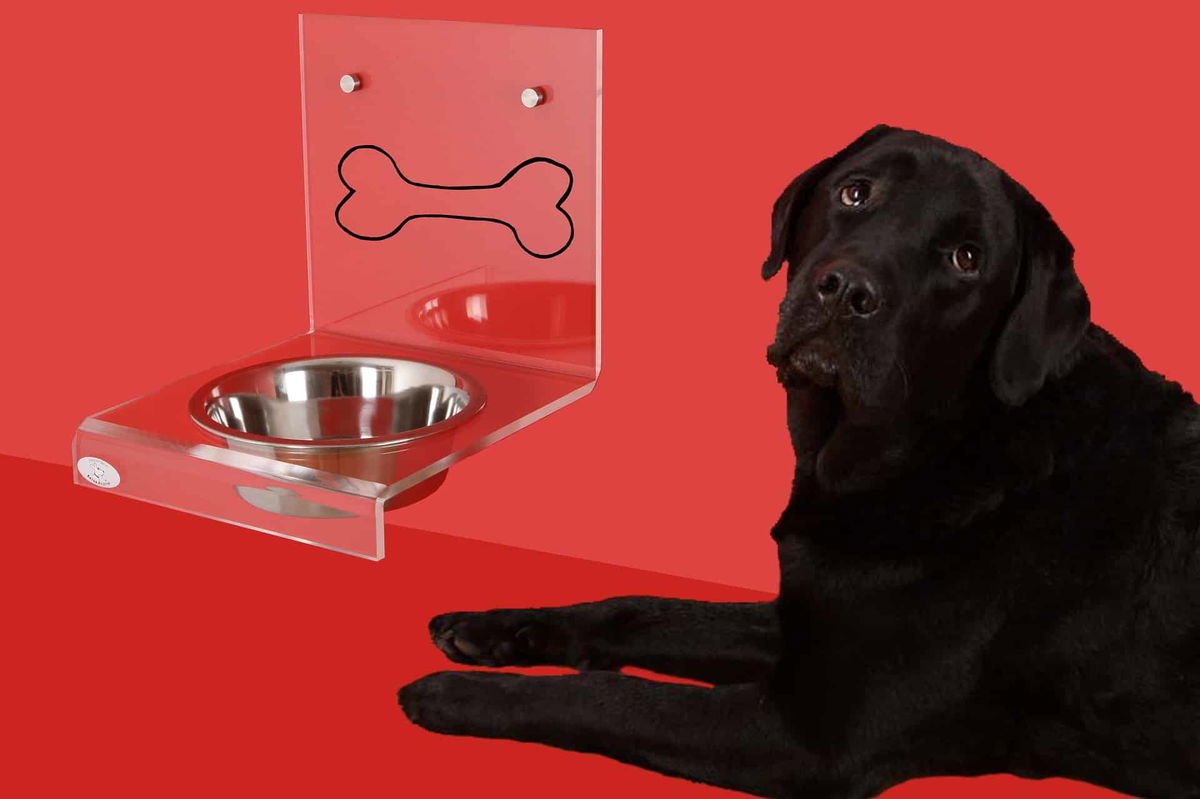
4. Wall-mounted dog feeder
Ever wondered if you could wall mount your dog’s bowls? Well, this idea has been illustrated by deeply southern home with simple materials.
If you are short of floor space, then you can consider mounting your dog’s bowl on the wall. It gives a good platform for your dog to feed and is much easier to clean.
The wall-mounted feeding station is beautiful and blends well with your home’s décor. It is also a great way to stabilize your dog’s bowl hence making it best suited for active dogs.
Do not forget to include a wall backlash on this beautiful feeder design. This will protect your house wall from water splash and messy eating. You can also cover the floor below the feeder with a pet feeding mat to keep the area neat.
5. Dog feeder with drawer
If you have a large dog breed, then they equally require a huge feeding station. Jen woodhouse has illustrated 7 simple steps to get this project done in a printable pdf file.
The storage compartment can be used to store your dog’s packed food and accessories.
Jenny used granite contact paper at the top because her dog is messy with water. This is a waterproof material and it helps with keeping the station free from moisture.
Being a large accessory, you need to add anti-skid materials at the bottom for stability. This will also keep the feeder in place when you slide the drawer.
6. Bucket-raised bowl
You will need an empty bucket and lid for this project as illustrated by mother daughter projects. Select the bucket size that corresponds to your dog’s size.
Mark the lid area for the opening needed to accommodate the dog bowl. And cut along the marking with a jigsaw blade. Put the bowl into the opening and secure it tightly to prevent wobbles.
You can put heavy material in the bucket to keep it stable. The bucket also provides a good space to store your dog’s packed food and water jars.
This DIY dog feeder can only accommodate one dog bowl. You might need a water fountain nearby to give your dog access to clean drinking water.
7. Simple dog feeder
An elevated dog feeder doesn’t have to be complicated. Simply put, you only need a secured stand to hold your dog’s bowl.
You can follow the easy plan by Katy from a shade of teal to come up with a raised dog feeder.
This raised dog feeder is portable. It can be placed in many places within the house and even use outdoors.
The main material needed for this project is a wood board, glue, and nails. The four stands will help to make the feeder stable to prevent tipping.
You may want to cover your dog’s feeding station with a pet feeding mat to prevent messing up the area when your dog eats.
8. Elegant dog feeder
With a little more time, imagination, and dedication, you can re-create this elegant raised dog bowl from Kara creates.
The elegant design blends well in your home and provides a compact place for your dog to eat and drink.
The top base has two slots for dog bowls and the sides are enclosed with drawers. This compartment can be used as a store for your dog’s accessories.
Kara estimates the cost of this project to be around 30 USD for the materials and consumables.
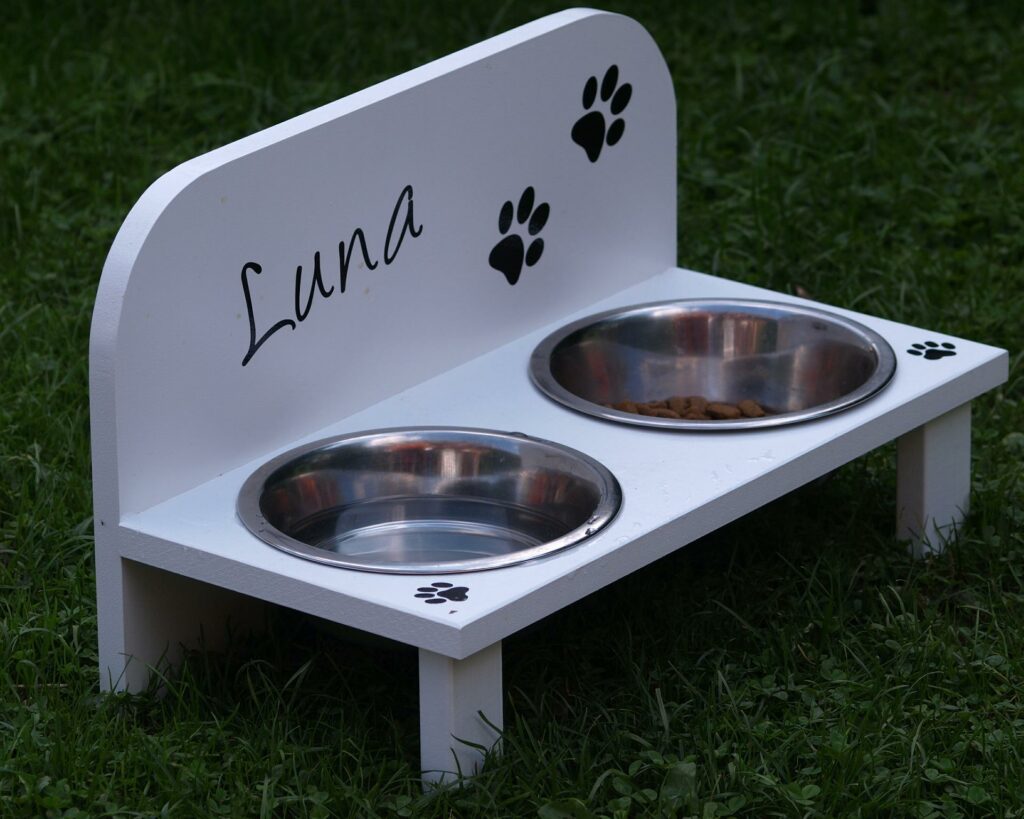
9. Raised feeder for small dogs
You can make this cute dog feeder for small dogs with simple steps from centsational style. This cute dog feeder is simple to make and it can also be used by cats.
Be sure to get the elevation right. Dogs should not strain their necks and joints when feeding. Ensure that the top level of this feeder is not above your small dog’s shoulder.
Due to their small sizes, large dogs can easily topple this bowl when moving around the house. You can add some rubber fittings to the stands to keep them more stable.
10. Dog feeder in the kitchen
If your dog loves spending time in the kitchen, why not build him a feeding station right there? You can follow the simple directions from wouldn’t it be lovely to actualize this idea.
This feeder is attached to the kitchen cabinet hence making it unique and very stable. This reduces the chances of bumping into your dog’s bowl on the ground level.
Having your dog bowls in the kitchen is also good because you will instantly be reminded to clean them as you do your dishes.
Be sure to fix this feeder on the side of your kitchen with no fire hazards.
11. Raised bowl on a flower pot
This simple project from instructables utilizes recyclable flower pots. You need to get the correct height for your pet. You can stack several flower pots to get the correct elevation, or cut down the flower pot size with a saw.
For this project, you will not be required to cut the circular opening for the regular bowl. You can ensure that you get the right fitting bowls by first measuring the flower pot’s diameter before purchasing the bowls.
This raised DIY bowl is best placed outdoors. You can place it outdoors as a water-drinking station for your dog in the yard.
Flower pots can be easy to topple. Be sure to fix this feeder in the ground using a strong bolt when using it outdoors.
12. Elevated bowls from old chairs
Do you have those old wooden chairs in your house and thinking of disposing of them? Hold on, you can turn them into usable accessories for your dog.
The DIY village has outlined the simple directions you can follow to actualize this project.
The normal chair size is well fitted for a large dog. But, if you have a smaller dog, you can cut down the stands to size. Always ensure that you get the right elevation for your dog’s raised feeders.
This modified dog feeder can be placed along the corridors of your house. You can also use benches instead of chairs.
Time To Get Started
You now understand how to make elevated dog bowls with clear directions. It’s now time to get the ball rolling. Feel free to slightly modify the DIY projects to match your preferred design and finishing.
We also welcome any idea that you want to share with our community.
If you find that making your own elevated dog bowl is complicated, then you might want to check our top picks for the best elevated dog bowls.
Laura is the founder of Furs'n'Paws. She is a also a pet writer and expert with more than 20 years of experience of working with dogs and cats. She developed a very strong love for animals at a young age. Her passion led her to establish a thriving pet sitting and dog walking business in Dubai. As an expert in pet training, behavior, and nutrition, Laura is committed to helping pet owners and pet lovers by offering high-quality information on a wide range of topics.
No responses yet